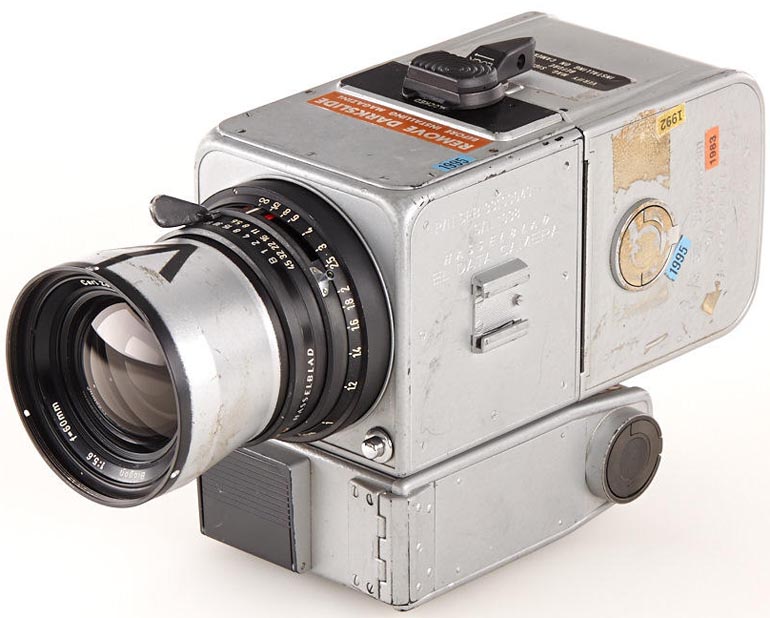
 Mr Fujisawa, founder of Japanese photography retail chain Yodobashi Camera, has just won a Hasselblad Lunar Module Pilot camera at the 25th WestLicht Camera Auction. The camera, a Hasselblad 500 EL data, was used by Jim Irwin to take 299 photos on the Moon while on the Apollo 15 mission between July 26th to August 7th, 1971. With a start price of 80,000 Euros It was expected to fetch up to 200,000 Euros , but after a close bidding war reached 682,000 Euros (over half a million quid!)
Details of the 25th WestLicht Camera Auction here.
The best camera to use to photograph the moon is a Single Lens Reflex (SLR) camera. With this type of camera you usually have the most manual control, allowing you to fine tune focus and exposure to ensure a sharp and bright photo.
 The moon photographed with an SLR and telephoto lens
An SLR usually has an interchangeable lens so you can attach a long lens (telephoto) to magnify the moon to make it much bigger in the photo. A standard zoom of 18-55mm that is normally provided with an SLR is not really long enough. You can use a lens like this but you will have to crop the picture dramatically to make it any decent size on your photo. The more you crop the less detail you will have in the moon.
The best thing to do if you want serious pictures is to buy or borrow a longer lens. A 300mm or above is good – Ideally a 1000mm or longer. You can do this using a 500mm with a 2x converter. The teleconverter sits between the camera and lens and doubles (or trebles with a 3x) the lens’ focal length / magnification. With modern digital SLRs the sensor is smaller than film and gives an effective magnification of 1.5x/1.6x too, so the 1000mm becomes 1500mm /1600mm. This is perfect for frame filling photos.
You will also need a tripod or other support for the camera to avoid camera shake if you are using a long lens, and a cable release / remote control to trigger the shutter. If you don’t have a remote release set the camera to the self timer mode and use that. The reason to use a delay or release mechanism is to prevent any hand contact with the camera that could cause vibration and the possibility of camera shake. This will be more apparent when using extreme magnification lenses.
Position you camera on the tripod or mount and set the lens to its longest setting.
Switch the camera to manual focus and adjust focus around the infinity setting so the moon appears sharp. If your camera has live view, switch to that and use the magnifier to help you focus.
You cannot use the camera’s auto exposure mode (P) because it will be fooled by the black surround of the moon which is really bright. A shot taken on auto will result in a bright blob of a moon with no detail. You need to switch to manual (M) or use exposure compensation.
Although it’s night time you don’t need long exposures the moon is as bright as daylight. Set the ISO to 100, and the aperture to f/11 and the shutter speed to 1/500sec and take a test shot. Have a look on the LCD preview screen and see how the photo looks. If it’s too bright either increase the shutter speed to 1/1000sec and/or the aperture to f/16. If it’s too dark, reduce the shutter speed to 1/250sec and/or the aperture to f/8. Then take another photo. Repeat this until you have a perfect exposure.
See article on the Blood Moon
 Mr Fujisawa, founder of Japanese photography retail chain Yodobashi Camera, has just won a Hasselblad Lunar Module Pilot camera at the 25th WestLicht Camera Auction. The camera, a Hasselblad 500 EL data, was used by Jim Irwin to take 299 photos on the Moon while on the Apollo 15 mission between July 26th to August 7th, 1971. With a start price of 80,000 Euros It was expected to fetch up to 200,000 Euros , but after a close bidding war reached 682,000 Euros (over half a million quid!)
 The moon photographed with an SLR and telephoto lens